Purchase Order Walkthrough
Create non-inventory PO
Receive non-inventory PO
Cancel non-inventory PO
Create inventory PO
Receive inventory PO
Cancel Inventory PO
Notes on Capitalizing Assets
Non-Inventory PO Creation
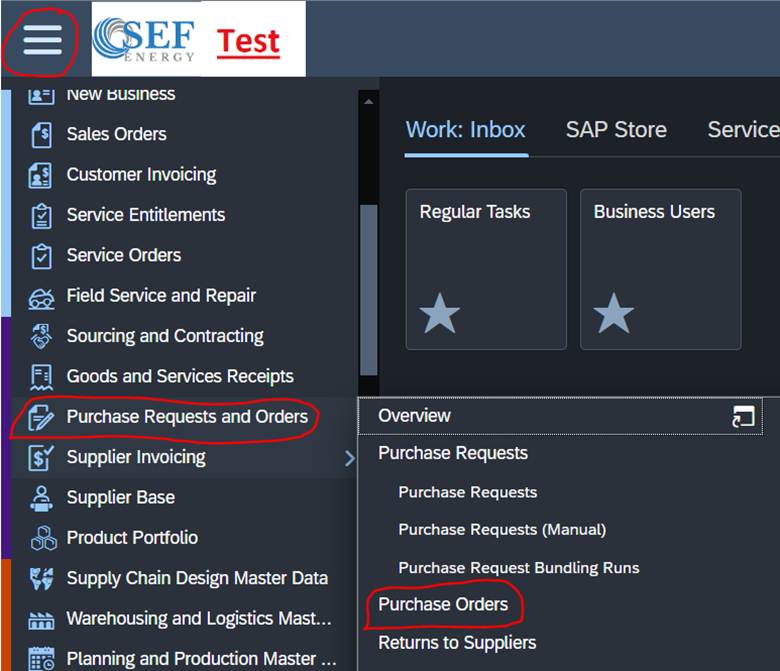
1. Hit the 3 lines at the top left and go to Purchase Request and Orders -> Purchase Orders
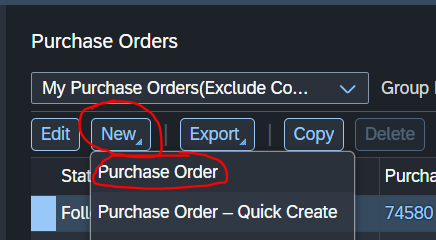
2. Click New -> Purchase Order

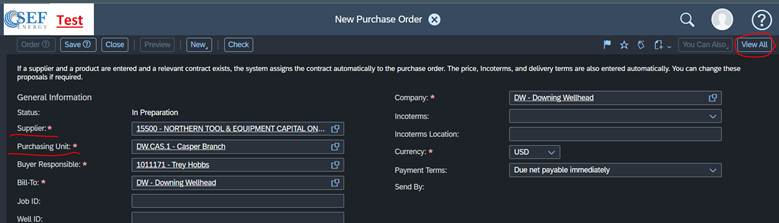
3. On the first page you will enter the supplier and make sure you have the correct Purchasing Unit entered and then click View All

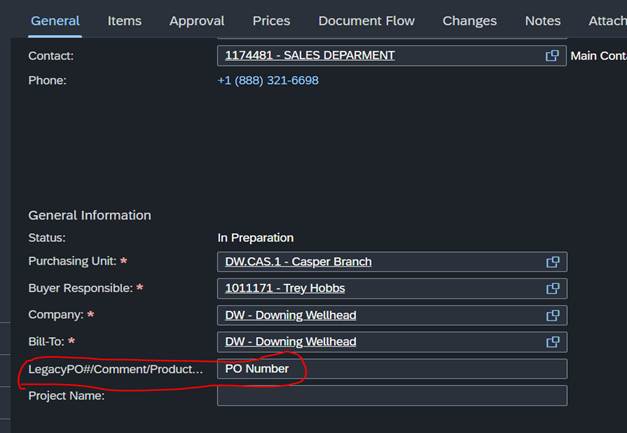
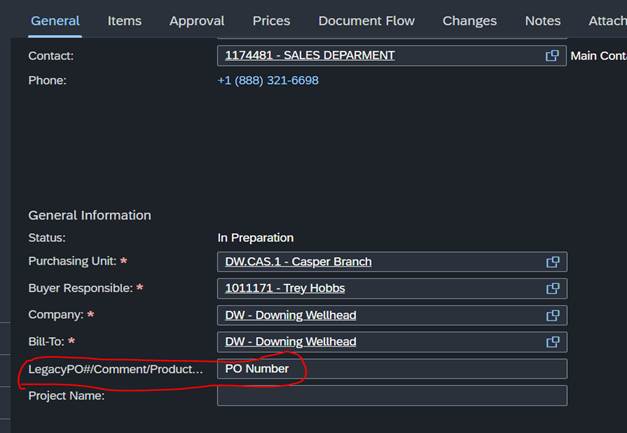
4. You will then scroll down on the general tab and add the PO number on the Legacy PO# field
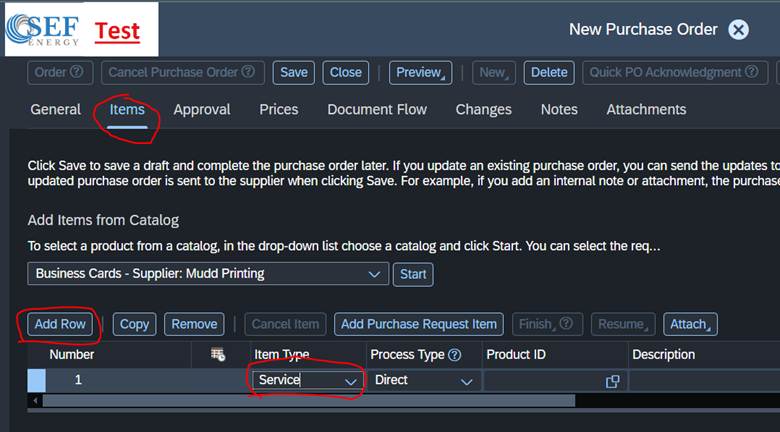
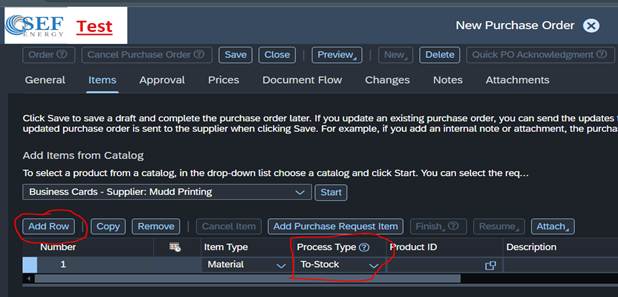
5. You will then go to the items tab and then click add row and change the item type to a service or material based on what you are ordering.
6. You will then add the description, product category ID, both the delivery dates, ship to/service location, quantity, Unit of Measure, and the price

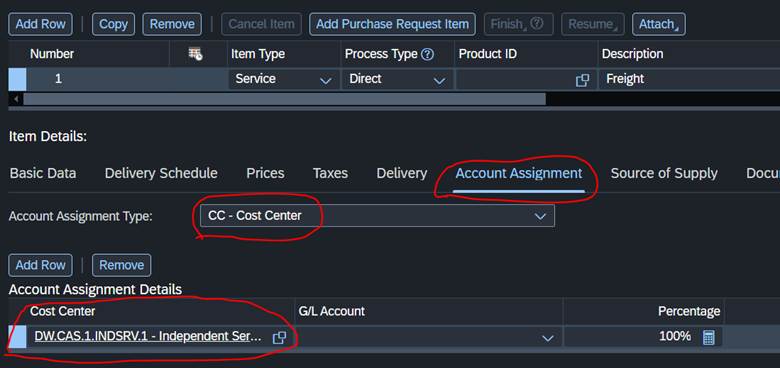
7. Then click the Account Assignment tab, then change the drop down to Cost Center and enter who to charge the Line Item to.
8. From here if you have more items, it is easier and quicker to copy the line item and then change the description, Product Category, quantity, and price.
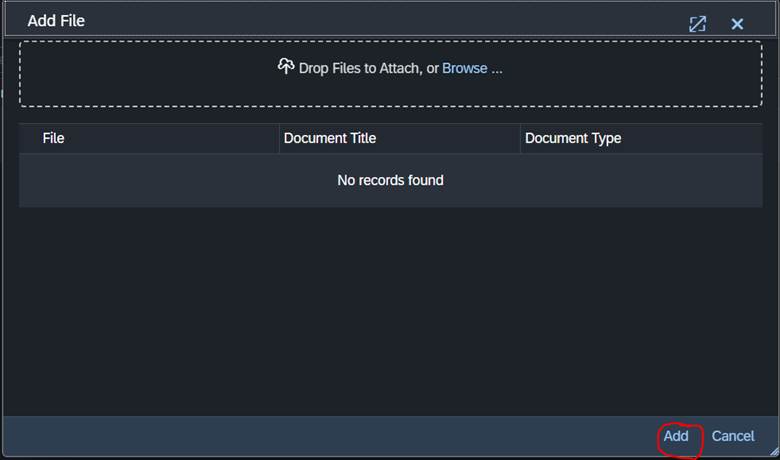
9. Now go to the attachments tab, then click add -> File

10. On this part you can drag the attachment over or click browse and add it that way. Then click Add
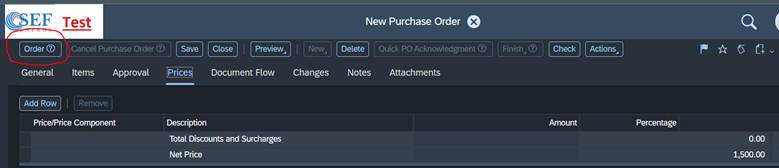
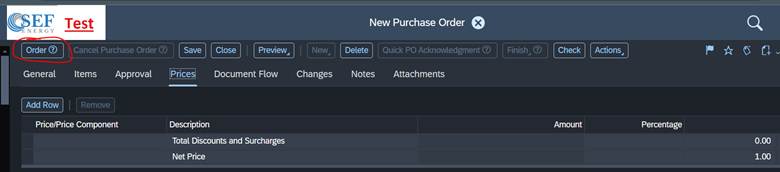
11. After this you will go through the tabs and make sure all of your info is correct, if it is then you will click Order and that will send it in to approval
Receive in non-inventory PO
1. Hit the 3 lines at the top left and go to Purchase Request and Orders -> Purchase Orders

2. You will then search for the PO you are trying to receive in

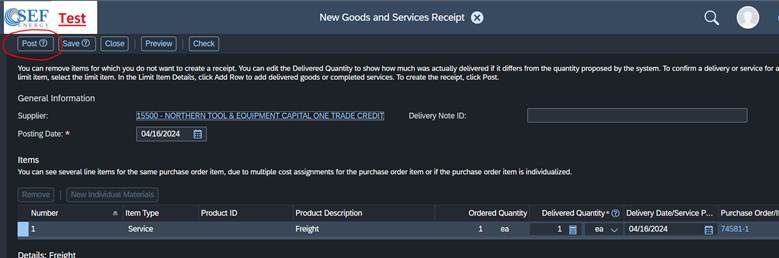
3. Now click New Goods and Services and Receipt

4. You will now verify that all the information looks correct and then click Post
5. After this it will be with accounting and there is nothing left to do with this PO
Cancel non-inventory PO
1. Hit the 3 lines at the top left and go to Purchase Request and Orders -> Purchase Orders

2. You will then search for the PO you are trying to cancel

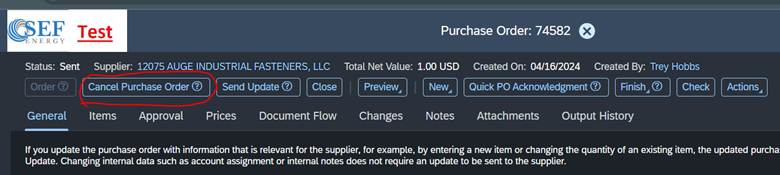
3. If the PO is not received in then you can click the 2 arrows on the right and click Cancel Purchase Order.

4. If it is received in then you will click the PO number and then click view all
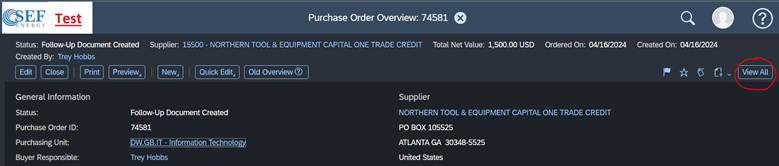
5. Then go to the document flow tab and click the goods and services receipt number

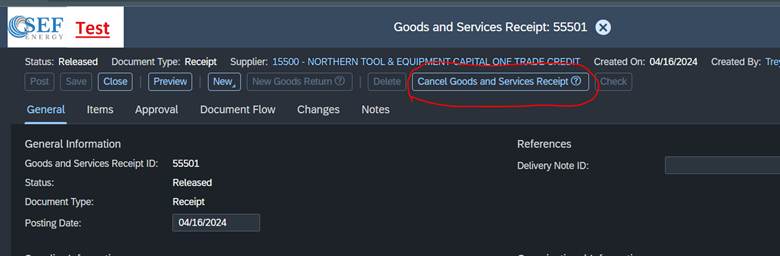
6. Then click view all on this page
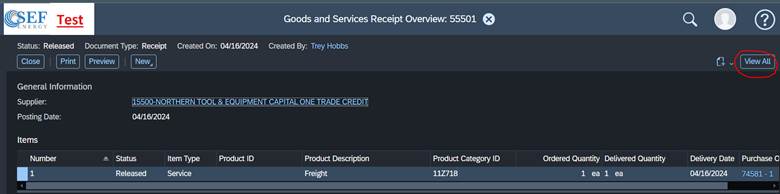
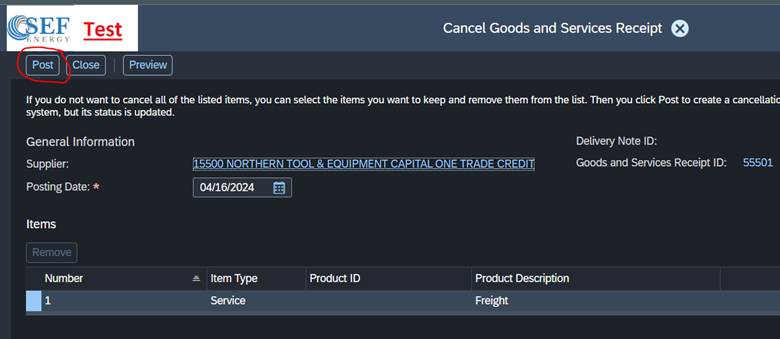
7. You will then click cancel goods and services receipt
8. Then click Post
9. Then click close
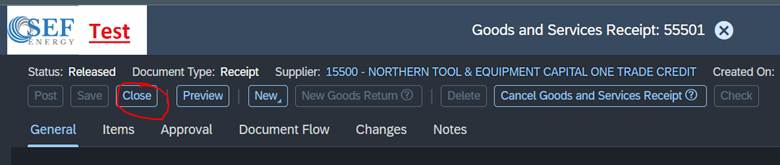
10. Then close and reopen the PO and click cancel Purchase Order and then yes when it ask if you are sure.

11. The PO is now cancelled
Create Inventory PO
1. Hit the 3 lines at the top left and go to Purchase Request and Orders -> Purchase Orders

2. Click New -> Purchase Order
3. On the first page you will enter the supplier and make sure you have the correct Purchasing Unit entered and then click View All
4. You will then scroll down on the general tab and add the PO number on the Legacy PO# field
5. You will then go to the items tab and then click add row and change it from non-stock to to-stock
6. You will then enter the product Id, delivery dates, ship-to location, quantity, Unit of Measure, and cost

7. Now go to the attachments tab, then click add -> File

8. On this part you can drag the attachment over or click browse and add it that way. Then click Add

9. You will then double check all of the information and if it is correct then click order
10. The PO is now in approval
Receive in Inventory PO
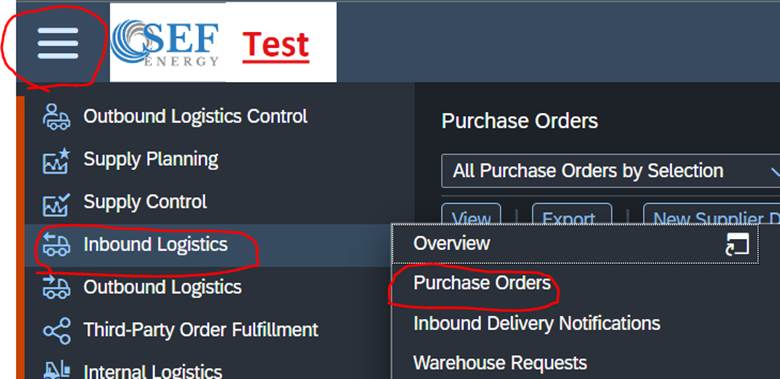
1. Click the 3 lines in the top left and go to Inbound Logistics -> Purchase Orders
2. Change the drop down to All Purchase Orders and then search the PO number and then click Post Goods Receipt

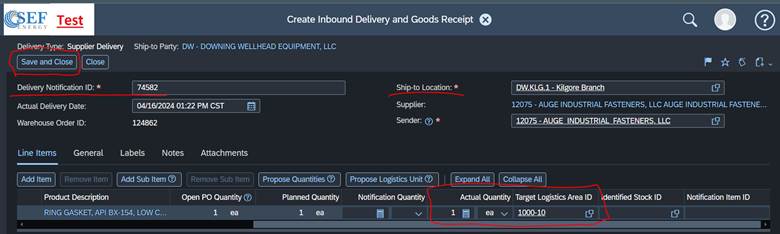
3. You will then enter the PO number in the Delivery Notification ID, Make sure ship-to location is correct, then slide the bar over and enter your actual quantity and logistics area and click save and close.
4. The Inventory PO is now received in
Cancel Inventory PO
1. Hit the 3 lines at the top left and go to Purchase Request and Orders -> Purchase Orders

2. Search for the PO number and then click on the PO number

3. Click View All

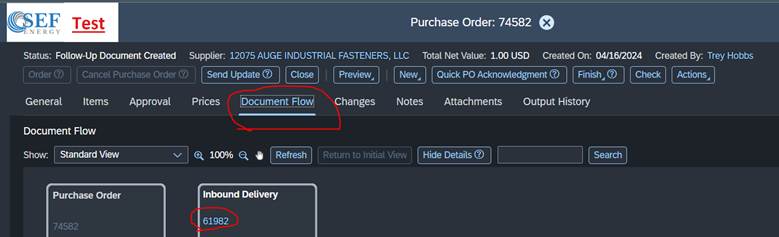
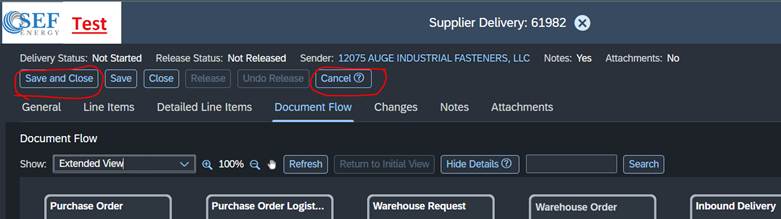
4. Go to the document flow tab and click the inbound delivery number
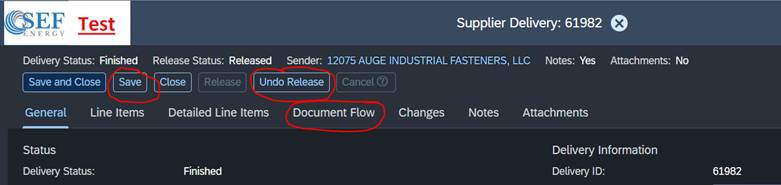
5. Click View All

6. Click Undo Release, then save, and then go to the document flow tab
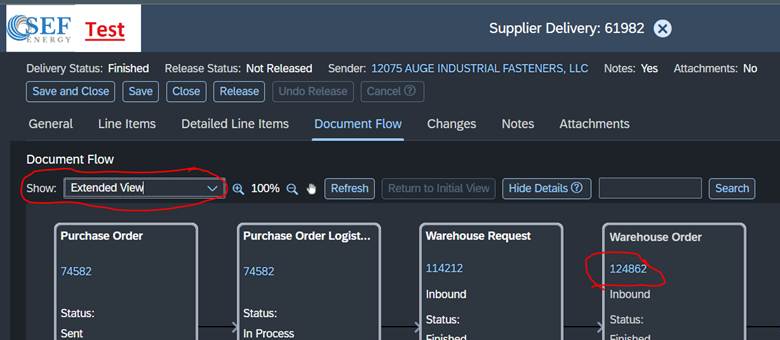
7. Change the the show dropdown to Extended View and then click the warehouse number and click view all
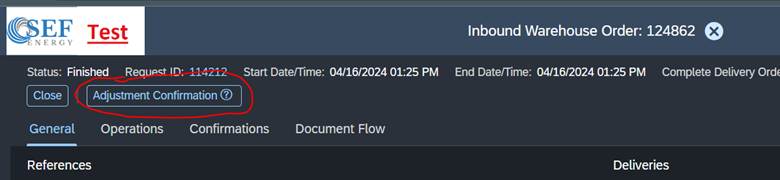
8. Click Adjustment Confirmation
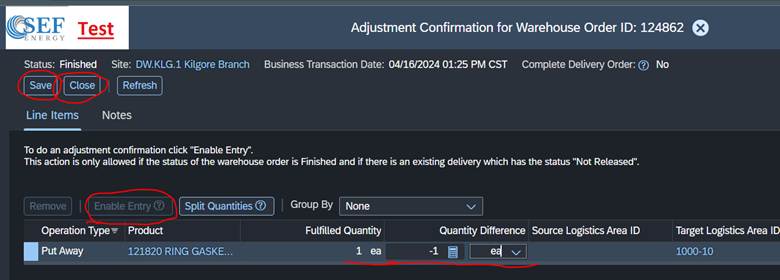
9. Click Enable Entry and then enter the negative of the amount you want to unreceive and click Save and then click close until you are back to the PO.
10. You will then reopen the Inbound Delivery and click View all. Once back there you will click Cancel on the inbound Delivery
11. Then close the PO and reopen the PO and click View All. Then click Cancel Purchase Order and then click yes when it ask if you are sure
12. The Purchase Order is now cancelled
Notes on Capitalizing Assets
Capitalizing Assets will be done as a non-inventory PO
While making the PO if you are capitalizing assets you will go to the notes tab and add the asset number(s) there
9Z Codes are used for capitalizing assets
These will generally be charged to DW.GB.RPR
Was this article helpful?
That’s Great!
Thank you for your feedback
Sorry! We couldn't be helpful
Thank you for your feedback
Feedback sent
We appreciate your effort and will try to fix the article