Sales Order Walkthrough
Create Sales Order and send to invoice
Back out/cancel a Sales Order from the invoice back Pages
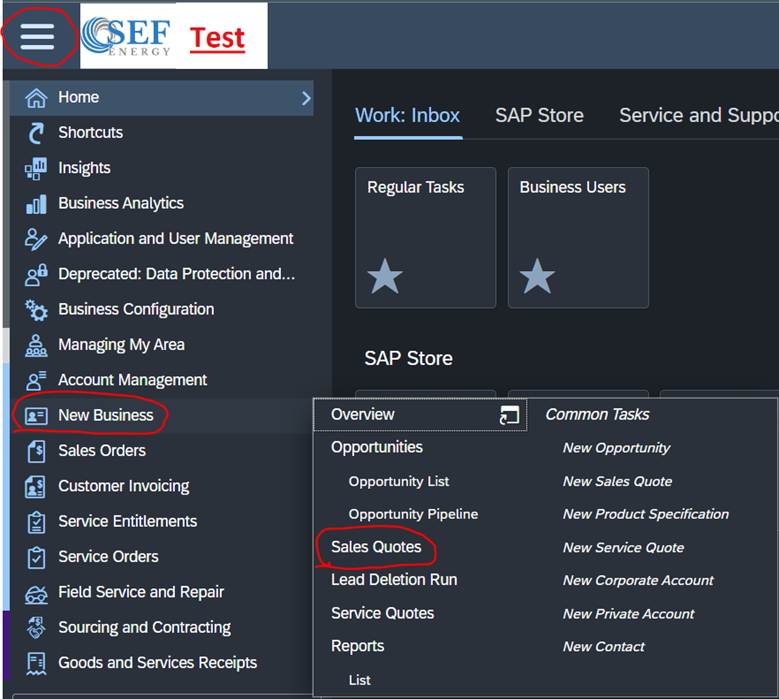
1. You will start a sales order from a quote. Click the 3 lines in the top left and go to New Business -> Sales Quotes
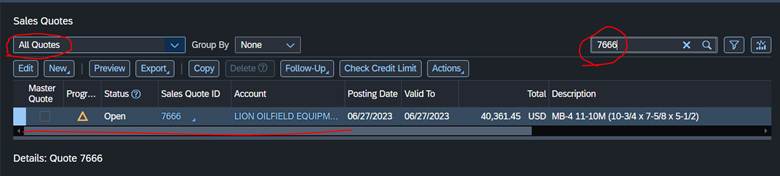
2. You will then search for the quote number you’re making the sales order from.
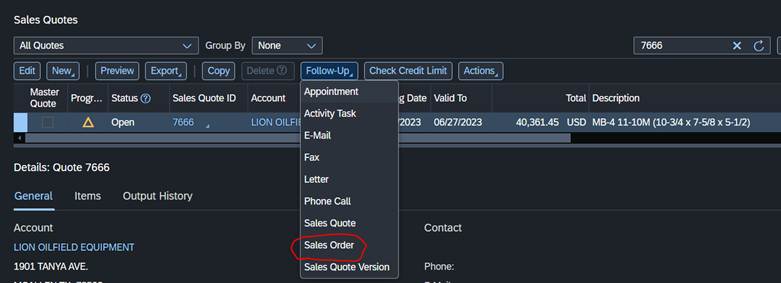
3. Click Follow-Up -> Sales Order
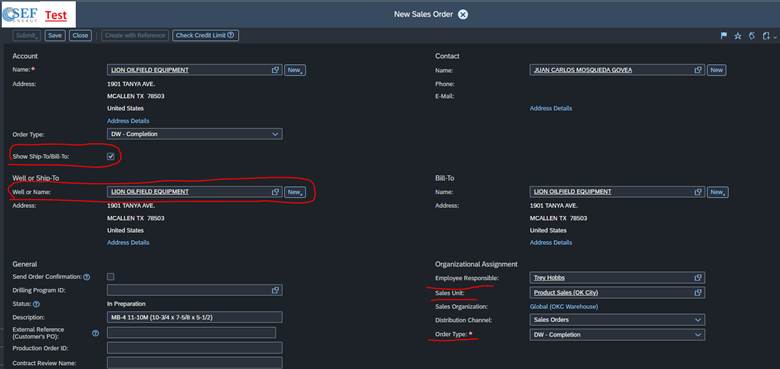
4. You will then check the show ship/bill to, enter the lease name in the ship to, make sure you are the person responsible and you have the correct sales unit and order type.
5. You will then scroll down and double check all of the items are correct and the ship from is your branch. You can also add/remove items here.
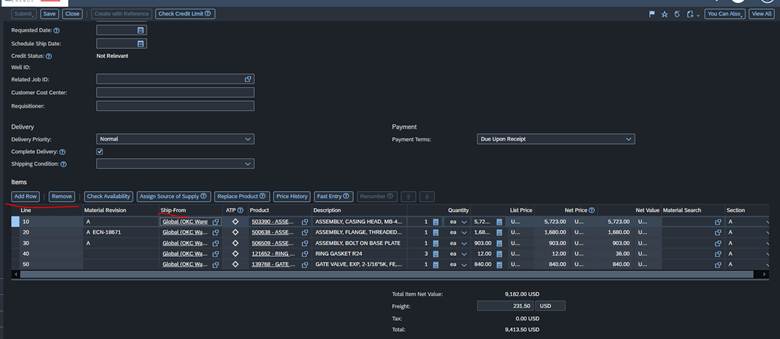
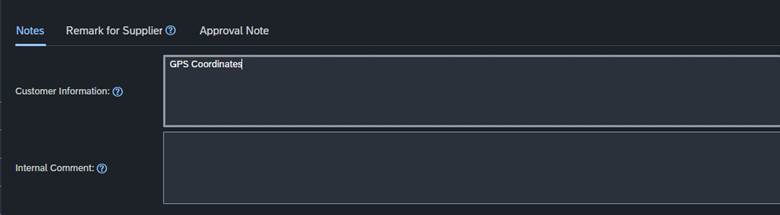
6. You will then scroll down past the items to the notes and clear the customer information and put in the GPS Coordinates
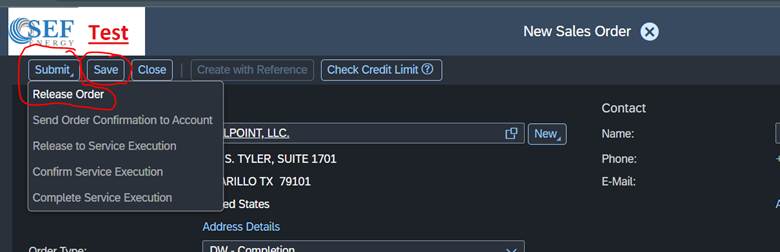
7. Now you will save it then submit -> Release Order
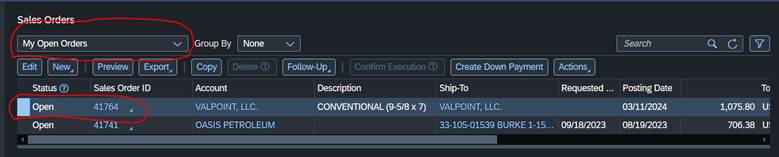
8. Now go to Sales Orders -> Sales Orders
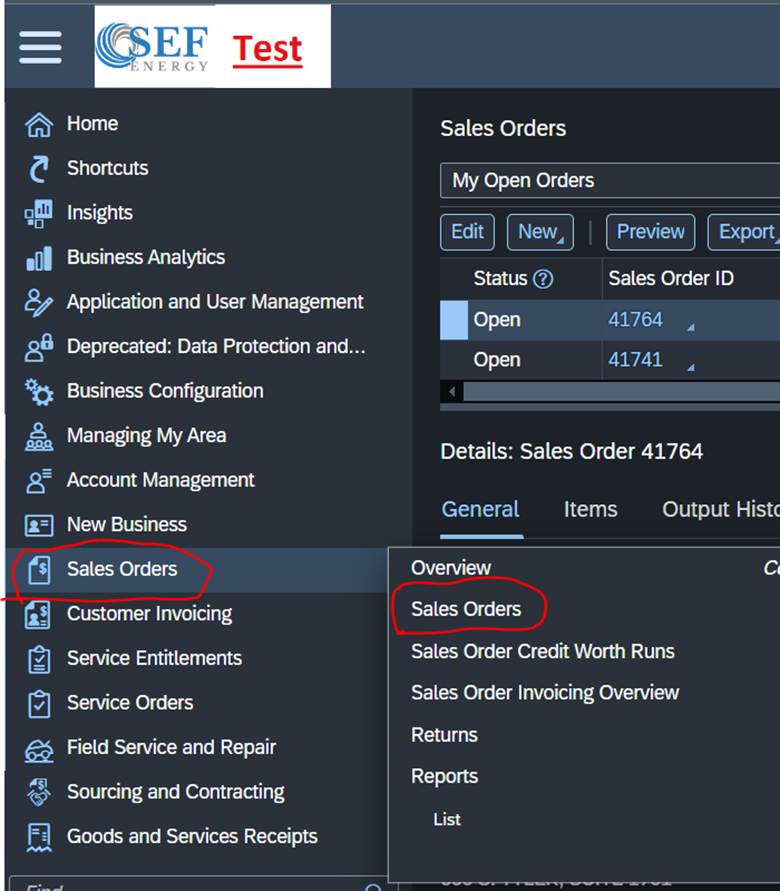
9. Change the dropdown to my open orders and the new sales order should be there, from here you can click into and verify info and make any modifications needed
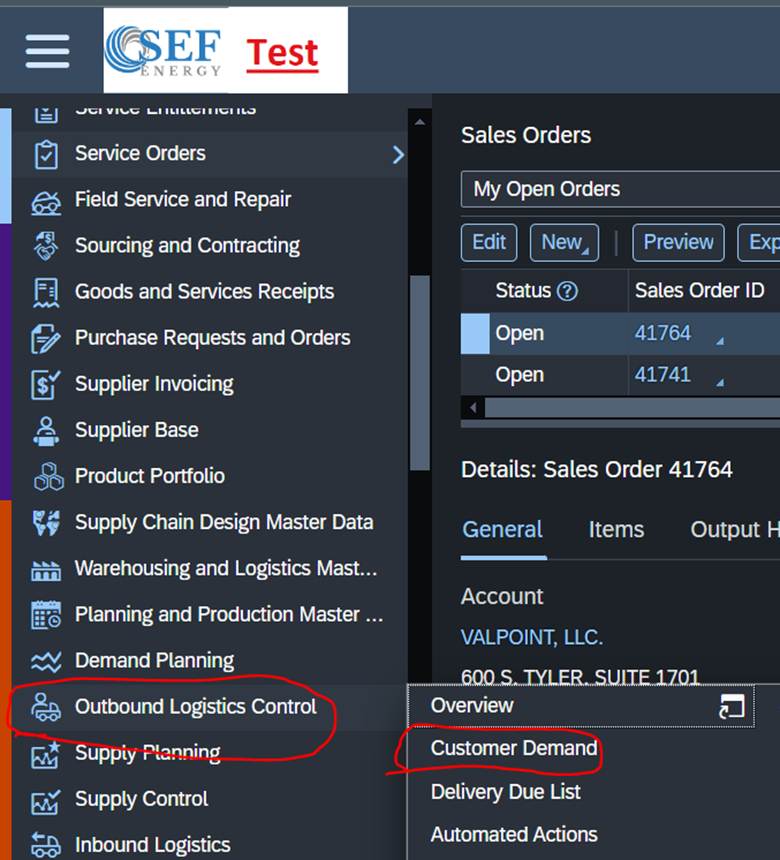
10. Now to ship it you will go to Outbound Logistics Control – Customer Demand
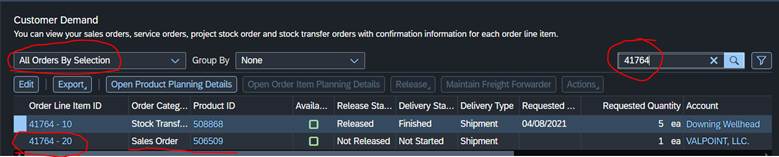
11. You will change the dropdown to All Orders by Selection and then search the sales order number.
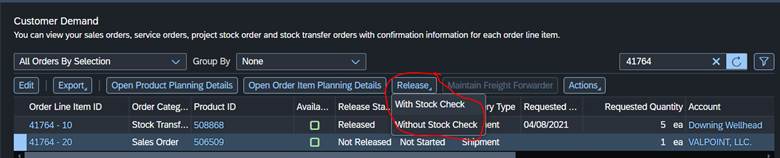
12. If the item is red and you know you have one you can do actions -> force the confirmation. If it is green you can do a standard release with stock check. You can select all lines tied to it and then do a release as well.
13. You will the go to Outbound Logistics – Delivery Control
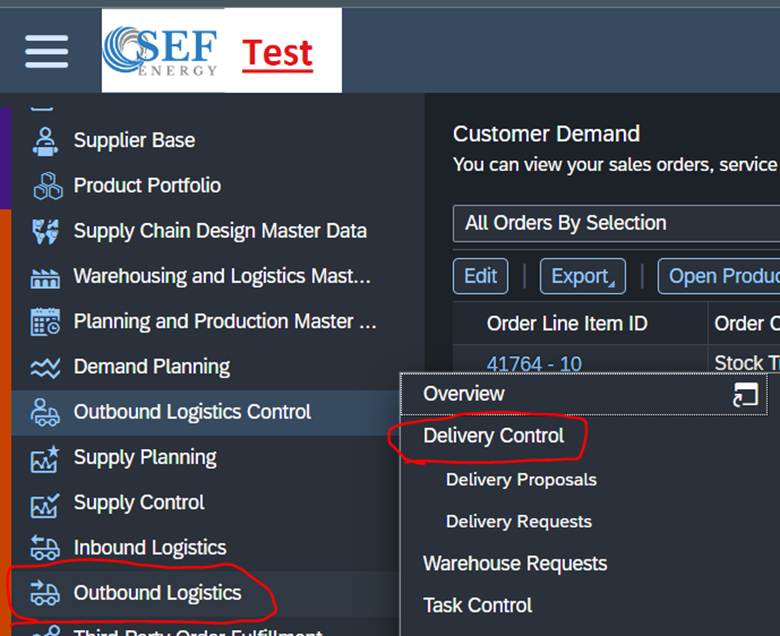
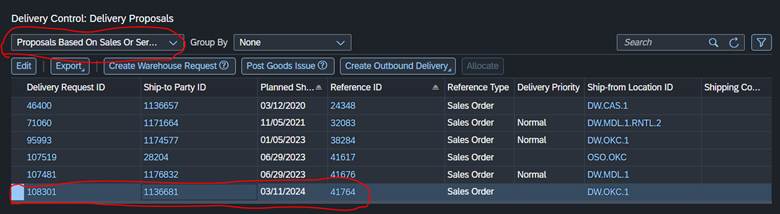
14. Change the dropdown to Proposals Based on Sales or Service Orders and find your order you made. You can also search for the Sales Order ID
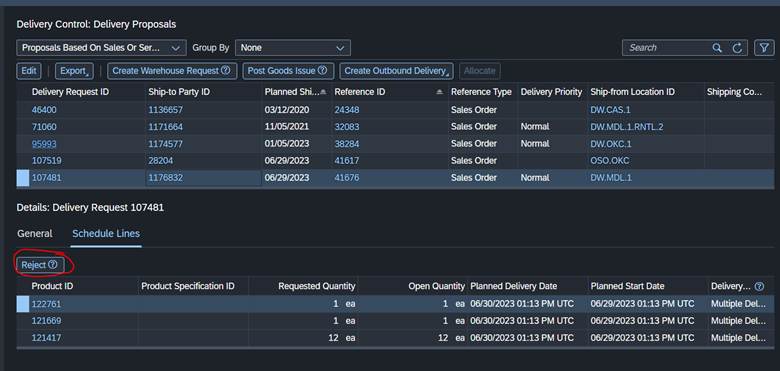
If this is a partial shipment you will select it and then go to the lines not being shipped and click reject. To go back and ship the rest of the order later you will start from step 11 and do it for the ones still open you want to ship.
15. With the sales order selected click Create Warehouse Request

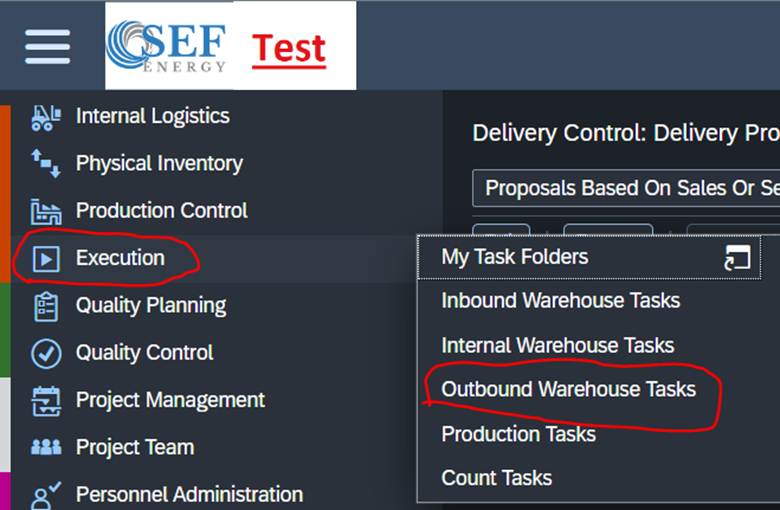
16. Now go to Execution -> Outbound Warehouse Task
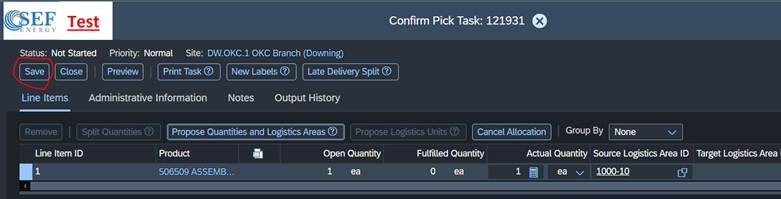
17. Search for the Sales Order ID and it should show your Warehouse Task. Now click confirm.

18. If you have a Product that requires serial numbers, you will add them here by selecting that product and going to the Serial Numbers Tab. This will then add them to the confirmed quantity. You will make sure everything that needs to ship is in the actual quantity. You will then Click Save.
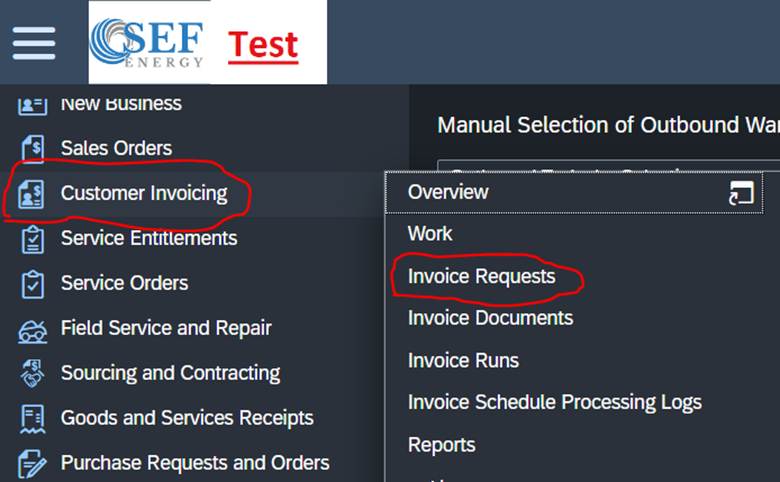
19. You will then go to Customer Invoicing -> Invoice Request
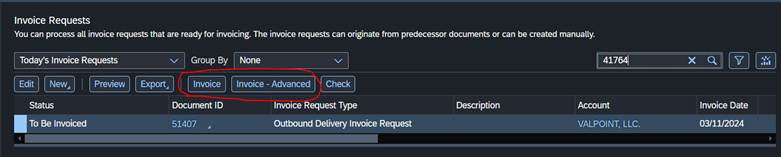
20. You will then search for the Sales Order you just made. And then select it and click Invoice or Invoice Advanced if you have documents that need to merge or to invoice multiple on the same Invoice.
21. After clicking Invoice Advanced, you will set the invoice date to today’s date and uncheck the Automatic Release and Down Payments Transfer check boxes. Then click OK

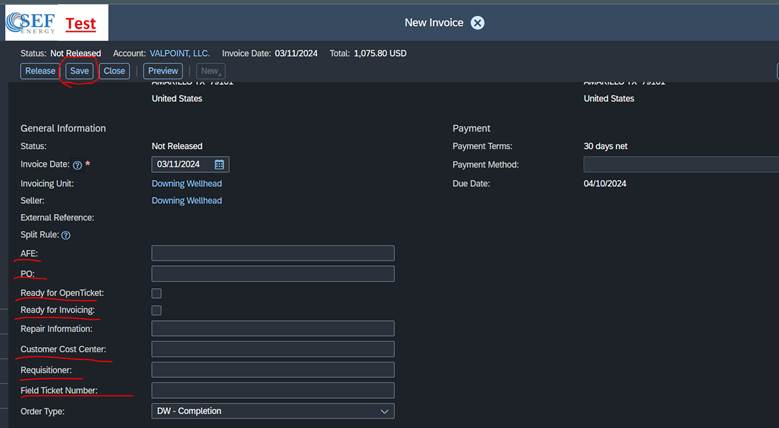
22. The next screen you will enter AFE, PO, Customer Cost Center, Requisiontioner, and Field Ticket Number if you have them. You will also check Ready for Open Ticket if it needs to go to Open Ticket and Ready for Invoicing if it needs to be invoiced. You will then scroll to the bottom and add any attachments to it and make sure to click the include in output so it goes to the customer when released. Click Save when done and this will create the invoice for Shellie to review and either invoice or send to Open ticket.
23. You can now see the invoice is made.

Back out/cancel a Sales Order from the invoice back Pages
1. If you are going to cancel an Invoice, you need to let AR know and make sure it is ok. Click the 3 lines in the top left to expand the work centers. Now go to Sales Orders -> Sales Orders

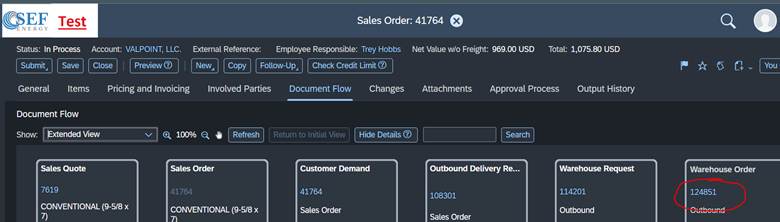
2. You will then change the dropdown to All Orders and search the Sales Order number and click into the Order and click View All in the top right corner.

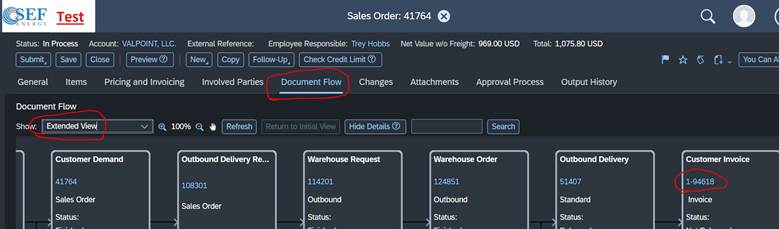
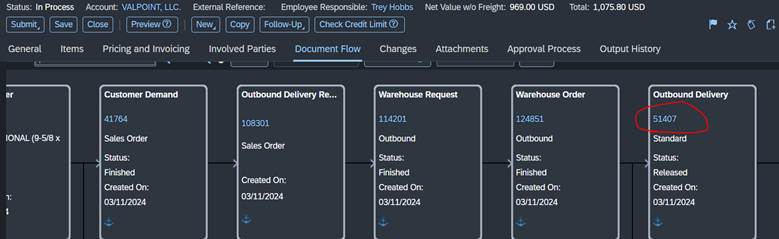
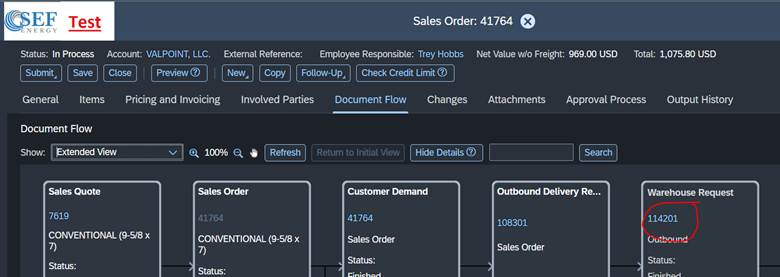
3. You will then go to the document flow tab and change the dropdown to Extended View. You can now see all the documents attached to this Order. You will then find and click into the customer invoice and click view all in the top right corner.
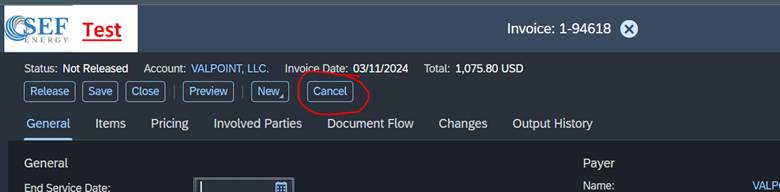
4. Now click Cancel on the invoice.
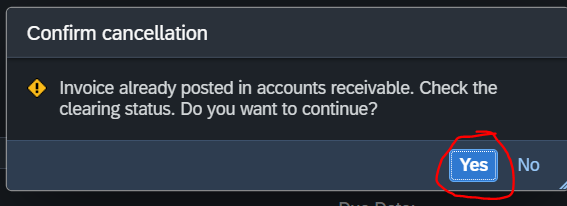
5. Now click Yes on the Confirm Cancellation.
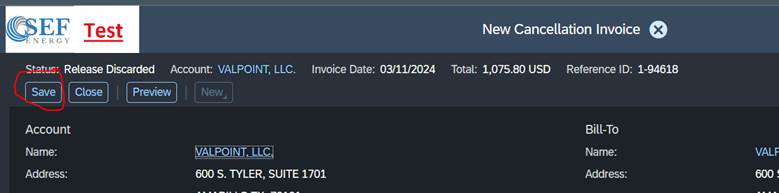
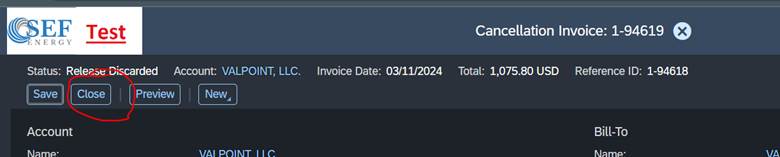
6. Now Click Save on the cancellation Invoice
7. Now click Close
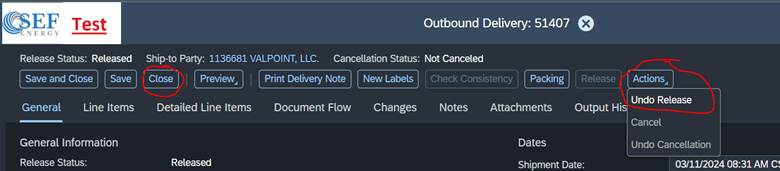
8. You will now click into the outbound delivery and click View All
9. Now click Actions -> Undo Release and then close
10. You will now go and click the Warehouse Order and click View all.
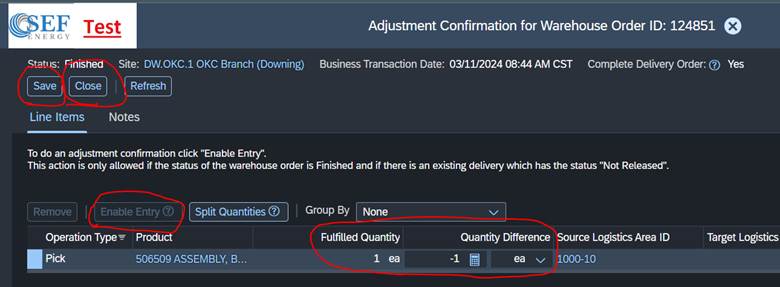
11. You will now click Adjustment Confirmation, click enable entry and enter the negative of the fulfilled quantity for each of the products. If there is a serial number part you will go to the serial number tab and click remove on each serial number. Now click save and then close. Then close again on the next screen.
12. You will now go and click the Warehouse request and click View all.
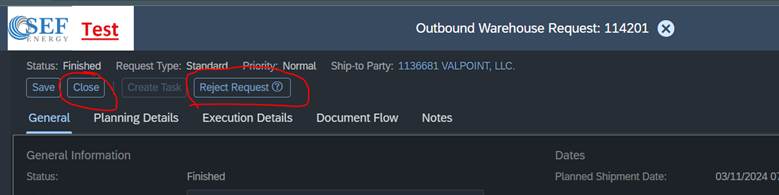
13. You will now click Reject Request and then close
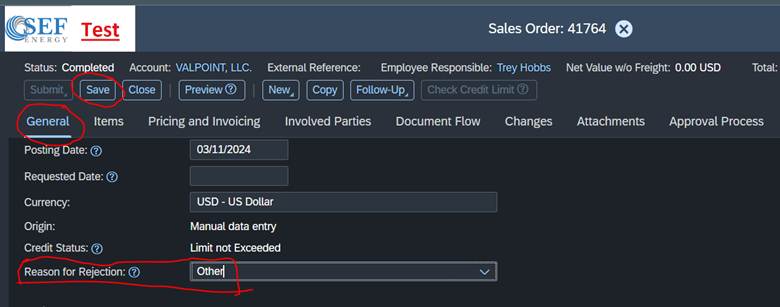
14. The Sales Order is now able to be modified or cancelled. To cancel the Sales Order you will need to go to the general tab and scroll down to reason for rejection and choose other from the dropdown. Then click save and it will now be in completed status.
15. The Sales Order is now cancelled.
Was this article helpful?
That’s Great!
Thank you for your feedback
Sorry! We couldn't be helpful
Thank you for your feedback
Feedback sent
We appreciate your effort and will try to fix the article